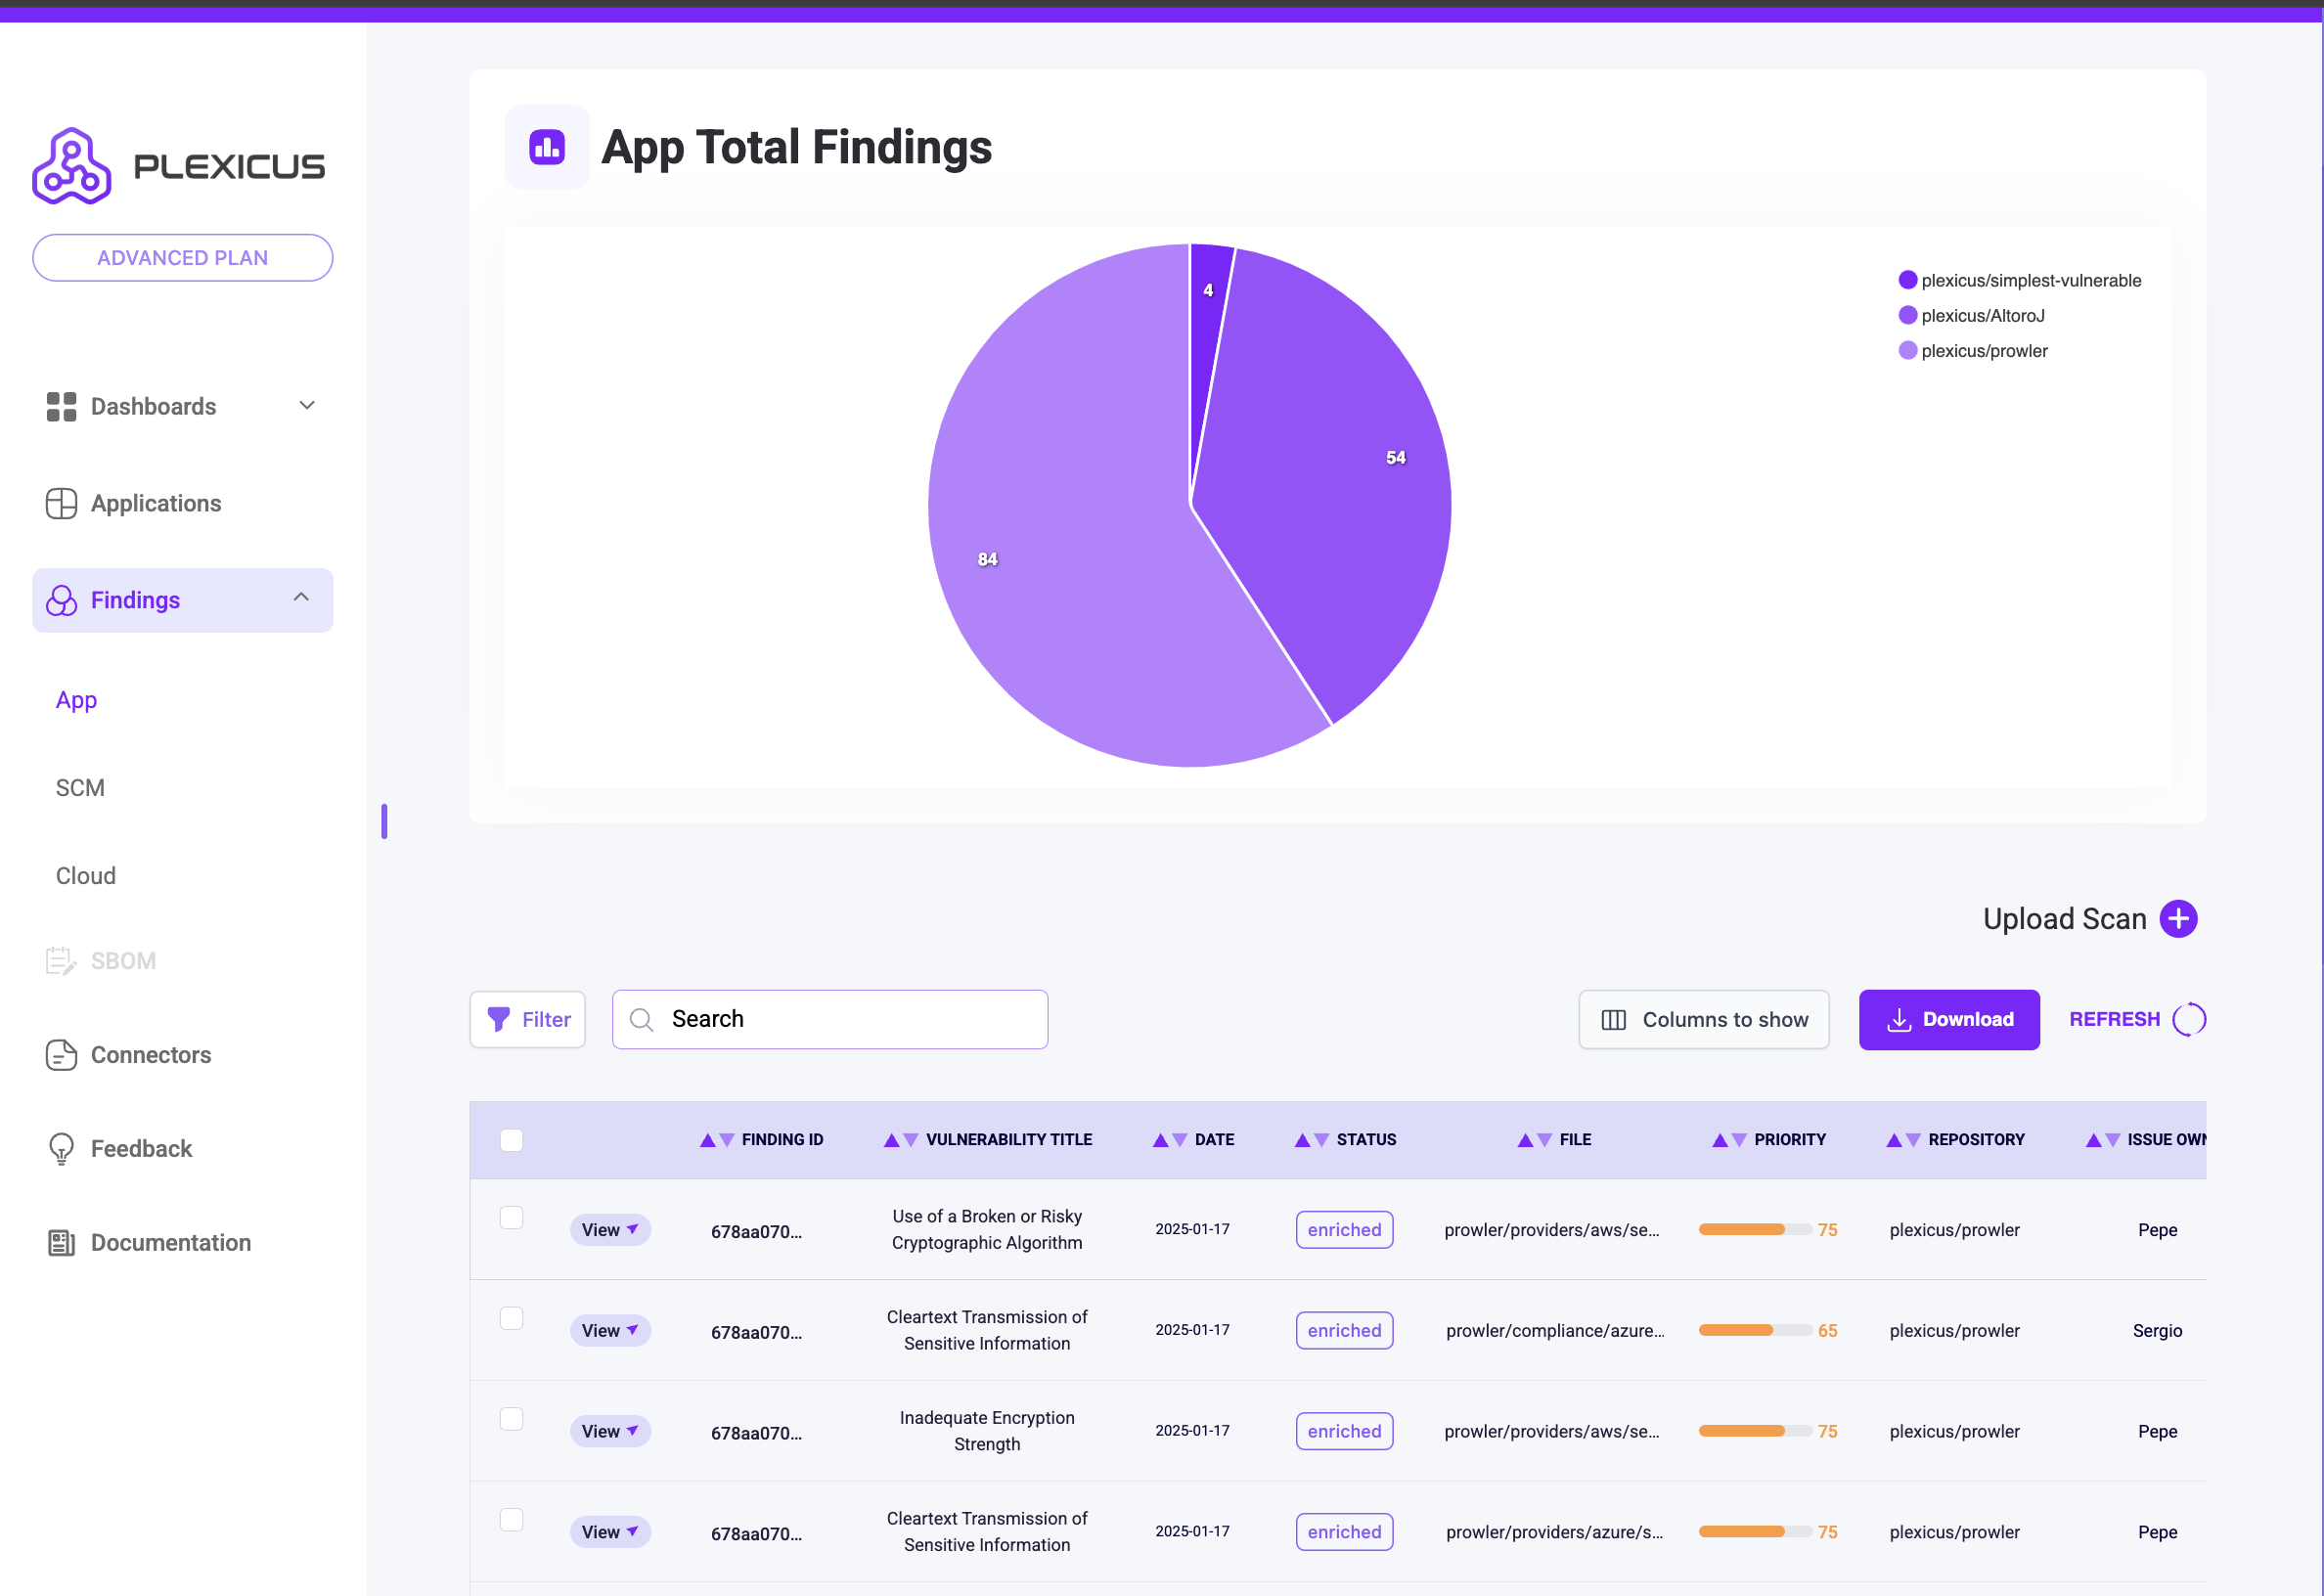
Skip to main contentThe Findings page displays vulnerabilities detected in your applications. This guide explains its key features and how to use them.
Subpages
- App (Application): Shows code-related vulnerabilities
- SCM: Displays findings related to the repositories
- Cloud: Presents findings related to Cloud services
Finding Statuses
- Enriched: Initial stage of generated findings
- Pending Input: Awaiting user input for remediation
- Ready: Remediation is complete
- PR Submitted: Pull Request has been created after remediation
- Issued: Issue has been created after remediation
- PR Accepted: Generated Pull Request has been accepted
Key Features
- Filter: Manage and apply filters to your findings
- Searchbar: Search for specific vulnerabilities by name
- Upload Scan: Upload a template scan to view results in Findings
- Columns to Show: Customize visible columns in the findings table
Viewing Finding Details
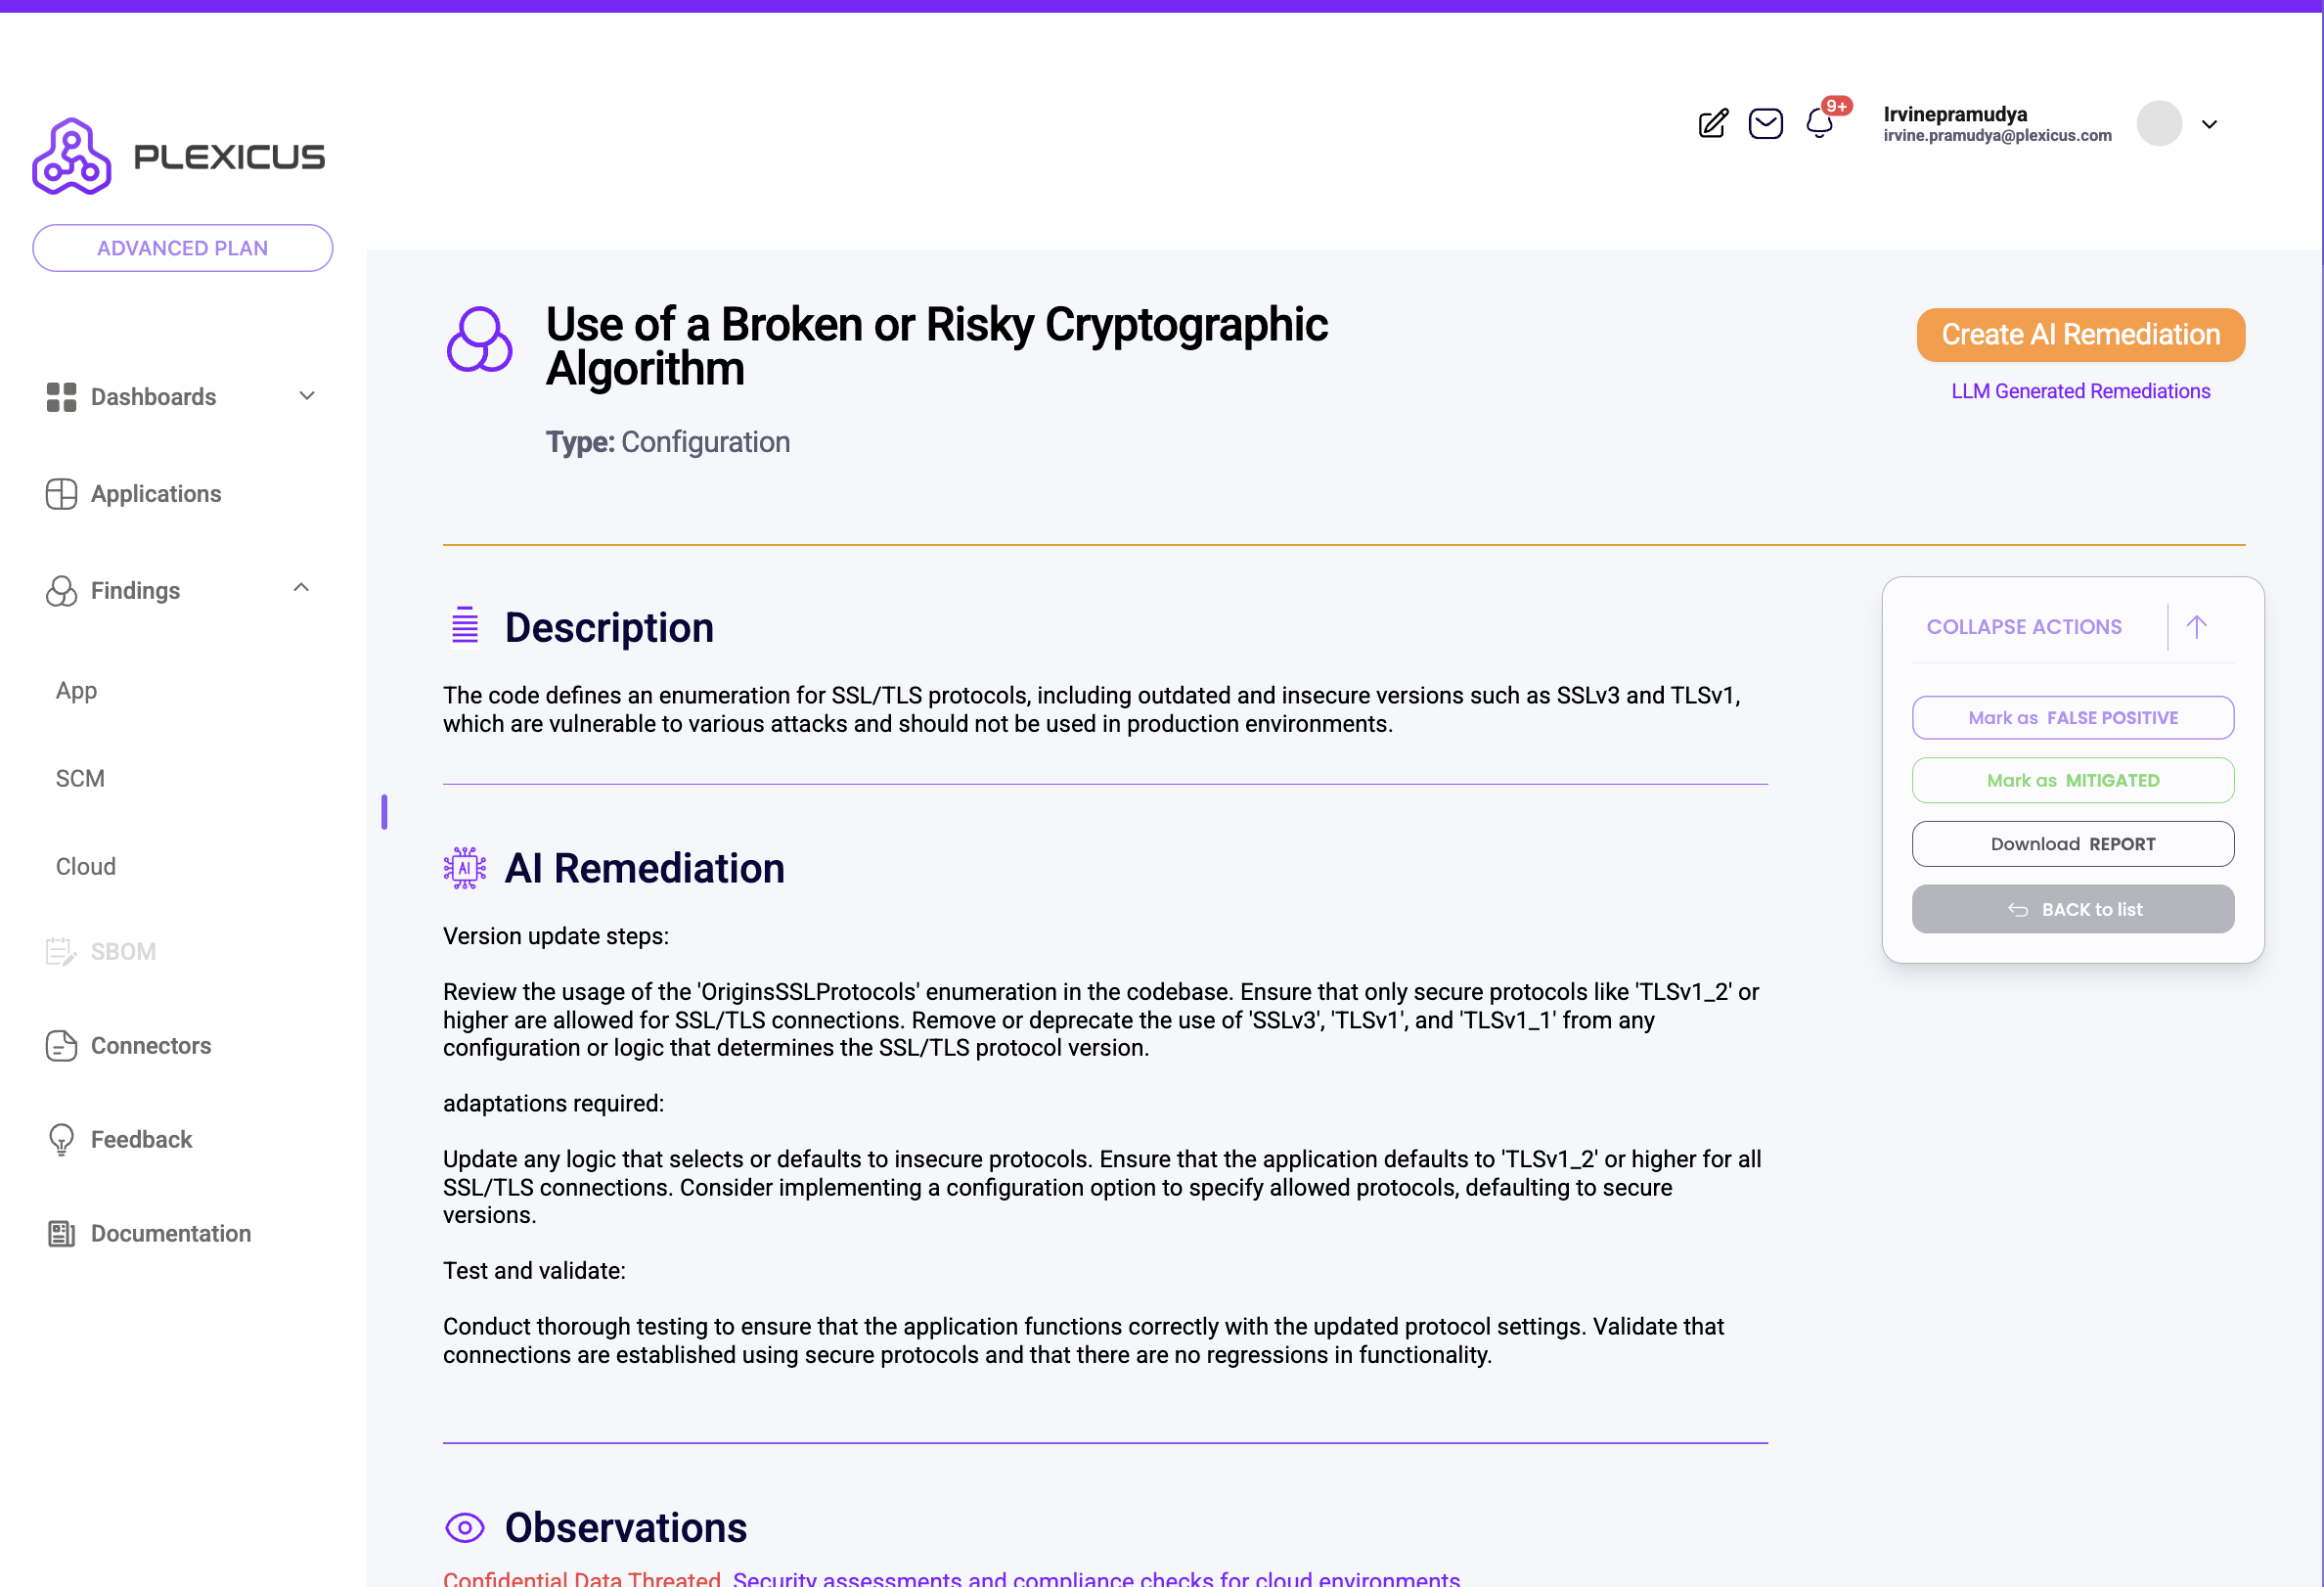
- Click the “View” button on any finding
- Access detailed information including:
- AI Remediation
- Summary
- OWASP Category
- Other relevant data
- In the finding detail view, look for the action button
- For Pull Request type:
- Button will show “Create AI Remediation”
- For Issue type:
- Button will show “Create Issue”
- Pending Input: Awaiting user input for remediation requirements
- Processing: Remediation is being processed (occurs when no template/input is available)
- Ready: Remediation is complete and ready for review
Next Steps
After reviewing findings, you can create remediations, submit pull requests, or create issues based on the vulnerabilities detected.